
Uninstalling Star Citizen
Star Citizen, the ambitious space simulation game, has captured the imagination of millions of gamers worldwide with its promise of immersive interstellar adventures. However, for various reasons, you may find yourself in a position where uninstalling the game becomes necessary. Whether it’s to free up disk space, resolve technical issues, or simply move on to other gaming experiences, the process of uninstalling Star Citizen should be straightforward and hassle-free. In this guide, we’ll walk you through the steps to uninstall Star Citizen from your system, ensuring a smooth transition and leaving no remnants behind.
Step 1: Preparation
Before diving into the uninstallation process, it’s essential to prepare your system. Close any running instances of Star Citizen and ensure that all associated processes are terminated. This step prevents any conflicts or disruptions during the uninstallation process.
Step 2: Accessing Control Panel
The most common method for uninstalling software on Windows systems is through the Control Panel. To access the Control Panel, simply type “Control Panel” in the Windows search bar and press Enter. Alternatively, you can access it through the Start menu or the Settings app, depending on your Windows version.
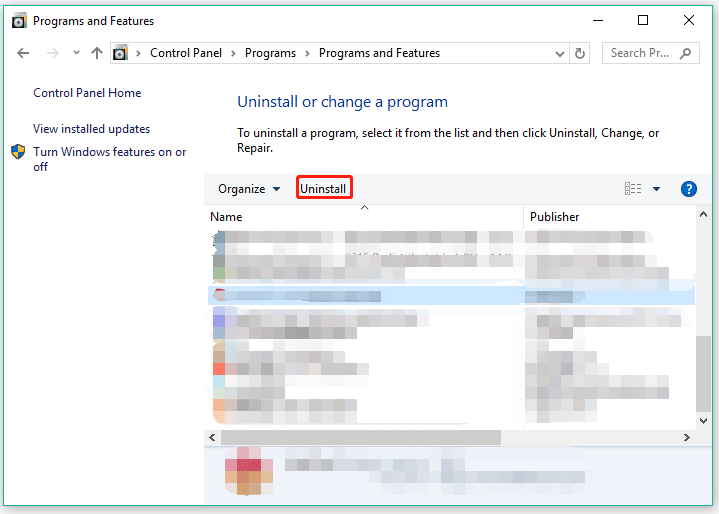
Step 3: Uninstalling Star Citizen
Once you’ve accessed the Control Panel, navigate to the “Programs” or “Programs and Features” section. Here, you’ll find a list of all installed programs on your system. Scroll through the list until you locate Star Citizen. Select Star Citizen, then click on the “Uninstall” or “Change/Remove” button at the top of the list.
Step 4: Follow Uninstallation Wizard
After initiating the uninstallation process, you may encounter an uninstallation wizard or prompt that guides you through the process. Follow the on-screen instructions carefully, as they may include options to preserve certain settings or data related to Star Citizen. If prompted, confirm your decision to uninstall Star Citizen.
Step 5: Removing Residual Files
While the uninstallation wizard typically removes the majority of Star Citizen files from your system, some residual files or registry entries may remain. To ensure a thorough uninstallation, it’s recommended to use a third-party uninstaller or system cleanup tool. Programs like CCleaner or Revo Uninstaller can help identify and remove any leftover files or registry entries associated with Star Citizen.
Step 6: Disk Cleanup
Once Star Citizen has been uninstalled, it’s a good idea to perform a disk cleanup to reclaim disk space occupied by temporary files and other system clutter. On Windows, you can use the built-in Disk Cleanup tool by searching for “Disk Cleanup” in the Windows search bar and selecting the appropriate drive (usually C:). Follow the prompts to initiate the cleanup process.
Step 7: Optional: Reinstalling Star Citizen (If Desired)
If you ever decide to reinstall Star Citizen in the future, you can do so by downloading the game installer from the official website or through the game launcher if you’ve previously installed it. Be sure to review the system requirements and available disk space before reinstalling to ensure compatibility and smooth gameplay.
Conclusion:
Uninstalling Star Citizen from your system doesn’t have to be a daunting task. By following the step-by-step guide outlined above, you can safely and effectively remove Star Citizen from your system, freeing up valuable disk space and resources. Whether you’re troubleshooting technical issues or simply ready to explore new gaming adventures, this guide ensures a smooth uninstallation process, leaving your system clean and optimized for whatever comes next.